Monday, May 29, 2006

Overdyeing - a kids' project

One of the "jobs" I have these days is being a substitute teacher. For now, I limit my subbing to the school where my own children attend. Since my oldest has gone through almost all of the grades there, I am quite familiar with all of the routines and curriculums. That helps to eliminate some of the stress a sub goes through when faced with a classroom of children eager to convince you "Mrs. X really does let us work together on math worksheets."

Last week I subbed in a 3rd grade class. This was a pre-arranged two day assignment. I love multi-day assignments because it allows me to plan ahead a fiber project for the kids. This time the kids overdyed light brown wool with food coloring. Educationally, it was a science experiment, in case the principal came in wanting to know how food coloring and wool were related to the students' instructional time. The presentation only took about 10 minutes. Putting fiber into their cup took about 20 minutes.

First, we talked about different foods that can cause stains. Putting this in the context of "has your mother ever gotten upset that you got strawberries/hot chocolate/juice/ketchup/mustard/etc... on your clothes?" we talked about natural dyes (strawberries, chocolate, mustard), fiber types (cotton, wool, synthetic) and the process of staining, aka dyeing.

Next, each student was given a strip of light brown wool roving about 12 inches in length. We used Wilton's gel cake decorating colors, which sadly I've recently learned is not light-fast but it served its purpose for this experiment. Each student picked a color. In cases where more than one student picked a color, we made an effort to make different strength solutions to get light and dark shades. Note: Ahead of time I made a list of possible colors on the board limiting the number of students per color lest we have all the boys pick blue and all the girls pick violet.

We put water, a glug of white vinegar, and some of the Wilton's gel into cups. The kids put their roving into the cup, use a spoon to submerge it (we didn't pre-wet the fiber) and place the cup in the sunny windowsill. My intention was to dye this using a modified "sun tea" method. Unfortunately, the sun wasn't cooperating. I knew by the end of the day that I had to speed up the process. I made use of the microwave in the teacher's lounge after school. Three of the cups were left un-finished on purpose so the kids could see the difference.

On the second day, I showed the kids the un-finished cups with the rovings. The fiber did have some color change but the liquid was also still colored. Then I showed them the exhausted cups. They were amazed to see the colorful fiber but even MORE amazed at the clear liquid. "Where did all the color go?", they all exclaimed! I used the two liquid examples to emphasize the need for heat as an integral part of this particular dyeing process recipe.

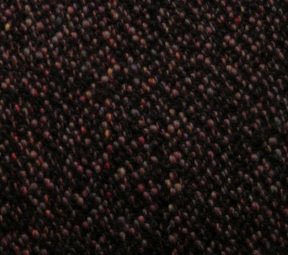
We also looked at some of the violet and black rovings up close. These food coloring colors tend to split - meaning they'll separate into their main colors and strike fiber unevenly resulting in splotchy dyeing. Some fiber artists call that a "feature" and rely on it for effect. I used this feature to remind them how colors are made (violet = red + blue, green = yellow + blue, black = many colors) and explained that in this case the colors didn't stay mixed once in the water and after separating, the fiber dyed with the separate colors. In our experiments, one of the violets was pink streaked with blue and one of the blacks was green.


The colors we used were:
Christmas Red
Red, Red
Leaf Green
Kelly Green
Yellow
Orange
Violet
Royal Blue
Brown
Black
The strip of light brown roving at the top just above the purple-violet and to the left of the red is a strip of the original colored roving.


Things to do differently next time:
1. Use glass jars instead of plastic cups. It lets the kids see the contents from the side instead of having to stand over the cup to look inside.
2. Pick less colors. Period. I let each student "own" a color but this meant that as I was working with the one student, the rest sat there unoccupied. This particular class is wonderful so there weren't any problems but I wouldn't count on that being the case in the future. From now on, I would work in groups (this was a class of 19 so perhaps groups of 5) and give the others a worksheet to occupy them until it was their turn.

What will become of the rovings? Check back in a few weeks because I've volunteered (i.e. no pay) to go back to the class in early June to finish up.

Friday, May 12, 2006

It's the little things....

that can make a chore so much easier. I've done toenail trimming before and it is such a big job for me that I could only do a handful of animals before being tired and plain worn out. I couldn't understand how Wayne (of Foothill, where we agist) could grab a foot, snip, snip, snip, move on to the next foot and be done with all four in no time flat.

A few weeks ago I was at 101 Alpacas for their shearing day. I went so that I could see how others do it and pick up on any tips for my own use. Well..... Vicki was using this tool that looked very much like a gardener's pruning shear to trim up toenails lickety-split! As I watched, I didn't see her doing anything particularly different from my method. She's considerable smaller than I am so I was pretty sure strength wasn't a factor. It had to be the tool. She said I could get a pair through Useful Items for around $20. I figured if they worked that well for her, it was worth it to me to get my own pair. And if they didn't work any better than the nippers Wayne uses, oh well, at least it's a write-off. I ordered myself a pair and they arrived Tuesday.

So today I went down to Foothill Llama and Alpaca Ranch with my new toenail clippers in hand. Wayne and I rounded up the boys where my two hang out. We caught BB who wasn't too keen on being restrained, let alone having his feet touched. I was a little worried about poking myself or the animal with the ends of the clippers so I proceeded very carefully. Wayne held BB's head and I "wrangled" a foot. Well, I must say I was VERY impressed with my new instrument. It cuts through black toenails like a hot knife through butter! Wayne and I trimmed up 5 boys in about 30 minutes (and weighed a few while we had halters on) and when we were done, I wasn't tired. More significantly, my back wasn't killing me from bending over. And of course the boys seemed to be walking a little prouder now with their newly manicured toes!

The tool is made in Japan by a company named Saboten. The blades are teflon coated and the handles are orange. I've been told there's a green-handled version out there that has stainless steel blades but the person said they bought those in Canada. Those are easier to re-sharpen. For now, I'm simply in love with my bright orange snips!

The next tool on my list: the Tooth-A-Matic tooth trimmer put out by The AlpacaRosa.

Thursday, April 27, 2006

Alpaca Fiber Everywhere but not a yarn to knit

Shearing time will soon be upon us and with that comes the decision of what to do with all that fiber. There’s the good: most people know what to do with that. There’s the bad: some owners may have a few ideas but most are open to new suggestions. And then there’s the ugly: I would bet that this ends up in the trash or compost bin at every ranch. What if there were other ways to deal with the Bad and the Ugly? What if you could actually make some money off that trash? Trash to Treasure? Well, maybe not treasure, but a few coins in the pocket are better than none!

Second and Third quality fiber make up a significant enough percentage of most alpacas’ shearing that it can, and should, be creatively put to use. The question most have is “how?”

Felt it. Okay. Now what?
Flat felt can be shaped into a hanging plant basket liner. Price these less than the popular (and expensive) coconut shell liners and you still get a tidy profit. A quick trip to your local garden shop will provide you with price points. Use your nastiest thirds for this product and you can even promote it as self-fertilizing! Go one step further and dye some of the fiber creating colorful inserts. Much better than those blah brown coconut ones!

Shoe inserts. Cut flat felt in the shape of shoe inserts to keep feet toasty warm in the winter.

Slippers. Flat felt can be cut to make slippers. Most fabric stores carry a slipper pattern.

Seat covers. Simple rectangles work well at keeping the driver’s bum off the car’s cold winter seat. These can also be used underneath children’s car seats to protect the car’s original upholstery.

Jingle Felt Balls. Cats love these toys. Make a larger version, insert several jingles, and babies love them too! Priced at $2-$5 each they are a popular sale item with ranch visitors. Again, add color and they sell themselves!

Felt Covered Soap. Wrap fiber around a bar of soap and felt it. Once rinsed and dried, it kind of looks like your soap bar has a sweater on! The best part about this product is that the coarser thirds exfoliate as the soap cleans.

Paperweights. Find a smooth rock large enough to be a good size paperweight. Felt over it just as you would the bar of soap.

Bag it.
Did you know ballet dancers use lamb’s wool in the toes of their Pointe shoes? Did you also know that the dancers complain about the scratchiness of this wool? Save those second cuts from the blanket and you have a softer AND more durable alternative for dancers. The wool product usually runs $4 for one ounce. A quick visit to a ballet studio with an offer of free samples to the studio director might just generate a long-standing, if small, revenue stream.

Fly fishermen love to tie their own lures. A small bag of alpaca fiber containing a variety of colors and micron counts can be marketed to locally owned sports goods stores.

Doll makers are always looking for long locks. Suri fiber that you consider too coarse might be perfect to a doll maker. Be sure to keep it in lock form.

Create a felting kit. Typically neck fiber is soft but short. That lends it perfectly to needle or wet felting. These kits can be sold in your ranch store or market the wet felting kits to local preschools or home school groups. Add a few packages of unsweetened Kool-Aid and you have a “Dye to Felt” kit.

Draft stoppers. Stuff the fiber into a long fabric tube along with some rice or pebbles to make a draft stopper for doors or windows. A quick Internet search will bring up some creative ways to decorate them.

Blend it.
Keeping in mind that the end product will only be as soft as the coarsest fiber, blend your seconds and/or thirds with a fiber of comparable micron count and staple length. Some examples are sheep wool, llama fiber, adult mohair, and dog brushings (another free ingredient). One ranch even blends with fiber from their Curly Hair horses and another uses hair from their Highland Cattle. Fiber people love to buy exotic blends!

The blends can be made into roving or spun into yarn. As these products tend to be coarser, they are perfect for rugs, tapestry weaving yarns, or non-garment items like bags.

Barter it.
There are several businesses that sell alpaca fiber products and take fiber in trade for credit towards your order. Recently AOBA published the “Directory of Fiber Resources” listing many of these companies. All AOBA members received a copy of this guide.

Over the next few months I'll post specific instructions, or pointers on where to find specific instruction, on all of these projects. Right now, you can find Felted Soap instruction in my March 2006 post. Check back here often for other instructions! And if there's a project you do with alpaca fiber of less-than-prime quality, leave a note in the comment section. I'd love to get more ideas!

Wednesday, April 26, 2006

Do you enter fiber art competitions?

I like to. At the very least, I receive feedback on my workmanship. Of course, I like seeing how I stack up to the other entries. In other words, what I should be striving to accomplish. The very best is getting a blue ribbon and some prize money.

Most of the time, I'll enter the local county fairs. Several around here get enough of a turn-out that you feel like there's actually a competition. There's nothing worse than entering only to find out that you were the only entry. It just takes away all pride you want to have in that blue ribbon.

Someday I want to enter one of the many privately run fiber arts shows like Black Sheep Gathering or Dixon Lambtown or maybe even Maryland Sheep and Wool Show. I'd love to get to Black Sheep again this year but our calendar is looking mighty full even though it's still April.

Entering local county fairs and even the private fiber art shows is fairly inexpensive. I suppose some of the reasoning takes into account that most fiber artists are really "starving artists". The county fair I entered last year had a fee of $1.25 per entry. Black Sheep's entry fees this year for yarn skeins is $1 and for fiber arts it's $2. Hmmm... I just noticed they take mail in entries through June 15th. Now I have no excuse for not entering! And neither do you!

Question to the public: What fees have you paid to enter a show? It can be a local county fair or a full-blown juried art show. Use the comment section to tell me. Include the name of the event. And if they offer cash prizes, tell me that too.

Kimberly

Tuesday, March 14, 2006

Thrums

There's always warp waste in weaving. The only way to use nearly 100% is to use a dummy warp for tieing on to the warping beam. In September, I wove a shawl using a painted warp and solid-color rayon for weft. It came out beautiful largely in part to the painted warp. So when I had to cut off the ends of the beautiful painted warp, I simply had to save them.

Today after seeing an innovative idea of rug weaving, I tied them together end to end, wound it on a bobbin, and started weaving.

Weaving made from thrums, fabric strips, and rayon yarn

I've used three components in this fabric: the thrums, medium brown rayon yarn, and half-inch strips of fabric. Each component gets a few shuttle passes and then I move to the next one.

What will I do with the fabric? I don't know. It hasn't told me yet.

Wednesday, March 01, 2006

Felted Soap

You couldn't ask for a more simple, enjoyable, and fun project! And I'm not just talking about something for the kids.

To use these fuzzy creations, you simply get it wet under running water and rub the fiber to lather up the soap. When you're finished, wipe off the excess soap suds and let it sit to dry.

Felted soaps are a gardener's best friend. Their fuzzy texture with its built-in soap dispenser makes cleaning fingernails a breeze! In fact, these soaps are better than a loofah.

So how does one make felted soap? Read on!

Step 1
Using a bar of soap, you're going to wrap it in fiber. I've used roving made from alpaca neck and legs that I dyed green (and in later photos it "magically" turns purple :-) but you can use any carded clean fiber. I wouldn't use uncarded fiber because it tends to create a lumpy fiber covering.
Step 1: wrap soap with fiber

Step 2
Using a gentle stream of water, wet the fiber and soap. As you are doing this, scrunch the entire thing to work up a soapy lather. An alternative is to add some soap foam from one of those hand soap dispensers that put out foam soap. This will get things started faster. Be careful not to shift the fiber in a way that creates holes. I've found the fiber felts pretty quickly so be sure to cover any bare spots right away. If you do end up with bare spots, you can try adding some more dry fiber. Sometimes this works, and sometimes this doesn't. It seems to depend on the type of fiber used. Step 2: wet and scrunch

Step 3
Felt. To wet felt (and not all fibers will felt - be sure to start with a feltable fiber like alpaca), fibers must be exposed to soap and agitation. Another component often found in wet felting is extreme temperature changes. Thankfully, we don't need that component in this process. So once you have a soapy lather, rub the bar of soap along its edges. The more you agitate the fiber, the more it will felt making a strong covering for the bar of soap.
Step 3: felt


Step 4
Rinse off the excess soap lather.

Step 4: rinse


And you're done! Let it sit out to dry.

Done!  Felted Soap

Tuesday, January 10, 2006

Finished Projects


In an effort to start the new year off right, I've finished two projects I started last year. The first are the felted slippers I mentioned in a previous post. For the felting process, I washed them in our washing machine with a load of clothes using hot water. Because we have a front loading washing machine, things don't usually felt well so I took them out and hand felted them some more in the sink. Then they were popped into the dryer for the final step. I'm quite pleased with the felting and fit results, although admit they'd work better on someone's feet who lives in a fully carpetted home. I find they're a bit too slippery for our linoleum and wood floors. These were made using handspun Lincoln wool.


green silk with handwoven jacket My second completed project is one I'm quite proud of. It is a dressy jacket made using dupioni silk and my hand-spun, handwoven yardage. The story of the woven yardage: I bought some black alpaca roving while at our very first alpaca show in Southern California around Fall 2003. We weren't showing - we were just interested in alpacas. I took home the roving and spun it but wanting to make it go as far as possible, I plied it with an Ashland Bay wool roving in fall colors. Beautiful yarn! In April 2004, I entered that yarn into a fiber arts competition at the Monterey Pronk, an alpaca show in Monterey California. It won a blue ribbon! The yarn then sat in my stash for a while as I tried to figure out what I wanted to do with it. Every spinner out there knows what I'm talking about - we have many yarns that sit until they "call to us". Well this one spoke to me when I had a black cotton yarn I had put on the loom to "play" with. That warp's purpose was specifically so I could experiment with different treadling and different tie-ups. But after I was "played" out, I found I had lots of warp left over. In a simple twill, I wove the 48" of fabric.

handwoven alpaca-wool over cottonBack to "let it sit until it calls to me". In September 2005, I pulled out my pattern stash. I wanted to use the fabric to make a vest but didn't find any patterns I liked. Instead this dress jacket called to me. I made a "muslin" using the pattern pieces, adjusted it to fit me, cut the pieces apart to accomodate the handwoven fabric width and made my jacket. It helps that I've got a lot of pattern drafting experience (see the link for Kings and Sages Apparel, my line of boy's clothing) but it really was quite easy. My next project is a black corduory winter (well, California winter) jacket using some of my other handwoven stash.

Close-up of woven fabric: handwoven fabric of alpaca and wool w/cotton warp

Wednesday, January 04, 2006

More socks - this time from alpaca

Handmade Christmas presents are fun to make and give. Part of the fun is the challenge of making the gift without the recipient knowing! I made these socks for dh. Actually, the gift he opened Christmas day were the socks on the needles 75% done. It took a lot longer to knit his socks than it did to do mine because of the secrecy. Once I could knit them in the open, they were quickly finished.


I used the same pattern as before using the large size this time. I actually knit both socks in tandem. I wound the yarn into a center pull ball and worked one sock from each end. When I ran out of yarn, I switched to plain white and finished them up. The colorations aren't an exact match because it was hand dyed roving. I handspun the yarn after dyeing it as well as some of the undyed white. The roving is alpaca neck and leg fiber. It's not something I'd want to wear on *my* neck, but it's absolutely perfect for socks! The durability is supposed to be incredible. Ask dh in a few years what he thinks. His initial opinion is positive with a dash of "could you make the leg longer next time?"

I have another alpaca neck/leg roving project to post about but as that's a present for someone, I have to wait until they open it lest it spoil the surprise!